Introduction: Cracked Bumper Repair


Here's a video tutorial on how to repair a crack in your car's plastic bumper.
Step 1: Remove the Bumper


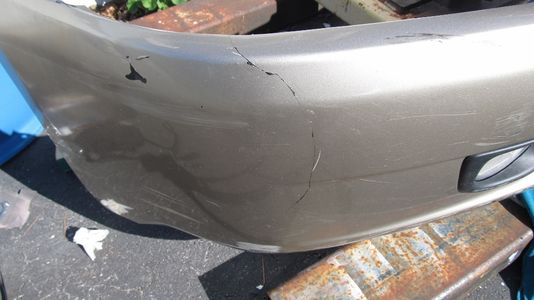
Here's what the bumper damage looks like before the repair.
The bumper was then removed from the vehicle, a few photos showing the inside and outside of the damaged area.
Step 2: Sanding


Next, use a dremel tool to carve a V shaped groove in the back of the bumper along the crack. This is to give the adhesive some more surface area to stick on. Then sand the area around the crack for better adhesion.
Tape up the front of the bumper so it holds with the crack flush. This is the position the bumper will be epoxied in, so make sure it is aligned correctly.
Step 3: Apply Epoxy


A clamp was applied at the top of the crack to prevent it from separating.
JB Weld Plastic bonder was applied along the crack. Its a two part mixture that was spread on using a small card or Popsicle stick.
Before the epoxy dries, put some drywall mesh tape over the back of the crack to reinforce the repair, and apply more epoxy on top.
Step 4: Fill in the Crack


Once the epoxy has dried overnight and cured, the tape and supporting clamps can be removed.
At this point you can apply touchup paint, or use filler to properly fill the crack.
First sand the damaged area on the outside of the bumper so the filler can hold.
Then apply a body filler suitable for plastic. In this case the incorrect filler was used, hence the final result wasn't as seamless as it should be. Sand the body filler down with 320 grit sandpaper.
Now is a good time to take care of other scratches within the vicinity of the damaged area since it will be repainted.
Step 5: Prime and Paint the Bumper


The sanded area of the bumper was then primed with two light coats of primer. It was then wet sanded using 400 grit sand paper and soap water.
A spray can was mixed at a local CarQuest to the correct color for the vehicle. It is a single stage paint, with base coat, pearl and clear coat in one can.
The proper way to finish the job would be to repaint the whole bumper, but since this was a quick cheap fix, I opted to blend quarter of the bumper. The result came out pretty good after two coats of paint.
Step 6: Reinstall the Bumper


Once the paint has cured and can be handled, the bumper can then be reinstalled on the vehicle.
The result is amazing, an almost undetectable repair, done at home for about $50 in materials.
In this case a small hairline crack can be seen where the crack once was, because the incorrect body filler type was used.